Clonezilla ile Yedek Almak 
Norton Ghost programının belkide açık kaynak kodlu en iyi alternatifidir Clonezilla...
Clonezilla, disk yedeklemek ve geri yüklemek için hazırlanmış, Linux tabanlı özgür bir yazılımdır. ext2, ext3, reiserfs, xfs, jfs of GNU/Linux, FAT, NTFS gibi dosya sistemlerini desteklediğinden dolayı hem Linux tabanlı sistemler için hem de Microsoft tabanlı sistemlerdeki disk bölümlerinin yedeklenmesi/geri yüklenmesi için kullanılabilir.
Sunucu sürümü (Clonezilla Server) ve çalışan sürümü (Clonezilla Live) olmak üzere iki çeşit sürümü bulunmaktadır. Clonezilla Live, tek bilgisayarda yedekleme ve geri yükleme için uygun olan sürümdür. Clonezilla SE (sunucu sürümü) ise, büyük yerleşimler için; aynı anda pek çok bilgisayarı (40'tan fazla) klonlayabilmek içindir.
Clonezilla Server
DRBL (Diskless Remote Boot in Linux) kullanarak aynı anda birden fazla bilgisayarın imajını almaya ya da tek bir imajdan birden fazla bilgisayara kurulum yapmaya olanak sağlar.
Clonezilla Live
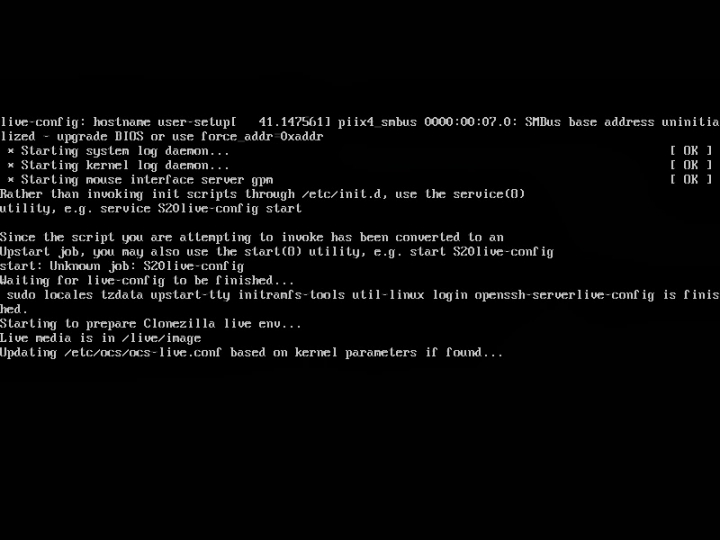
Boot edilebilir CD/DVD ya da USB flash kullanılarak yedekleme/geri yükleme işlemlerinin gerçekleştirildiği bu versiyonda, sadece tek bir bilgisayara ait işlemler yapılabilmektedir. Ancak DRBL yapılandırması gerekmediğinden dolayı kullanımı Clonezilla Server Edition'a göre daha basittir.
Kullanımı
Clonezilla buradan indirin.
Kullanım klavuzunu pdf olarakta indirebilirsiniz: http://yadi.sk/d/BRy08k74DamFQ
Cd'ye veya USB'ye yazın. USB'ye yazma için XBOOT (XBoot: Free Utility to Create Multiboot USB and CD) kullanabilirsiniz.
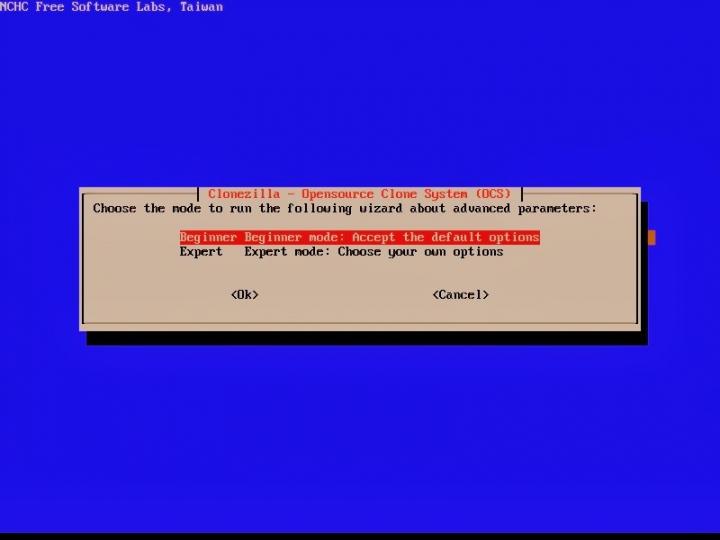
A)Yedek alma (Üstüne yazı yazmadığım resimlerde seçili olan seçeneği seçeceksiniz demektir)


Expert mode seçerseniz iso dosyada oluşturabilirsiniz

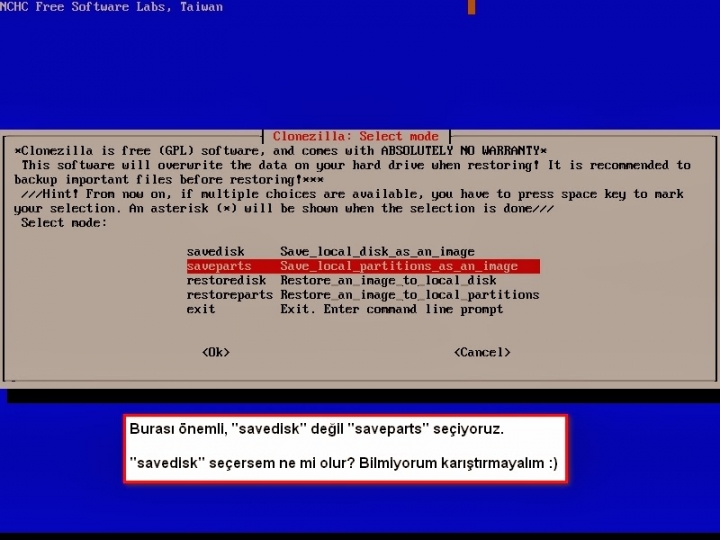
Savedisk: Komple parttionları ile birlikte diski klonlar.


B) Yedeği geri yükleme:


İngilizce bir başka kaynak:
Backup
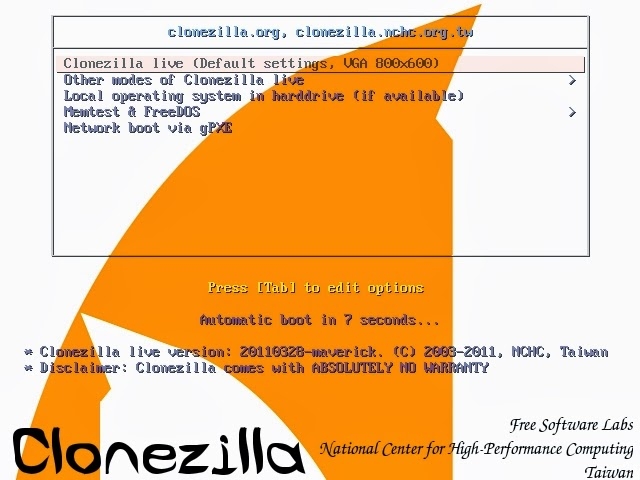
This is the first step, where an image of disk partitions will be created (one image per each partition). So, insert Clonezilla Live CD and reboot your system. From boot menu (usually pressing DEL during boot), select boot from CD. Of course, you may use a bootable USB, if you prefer.
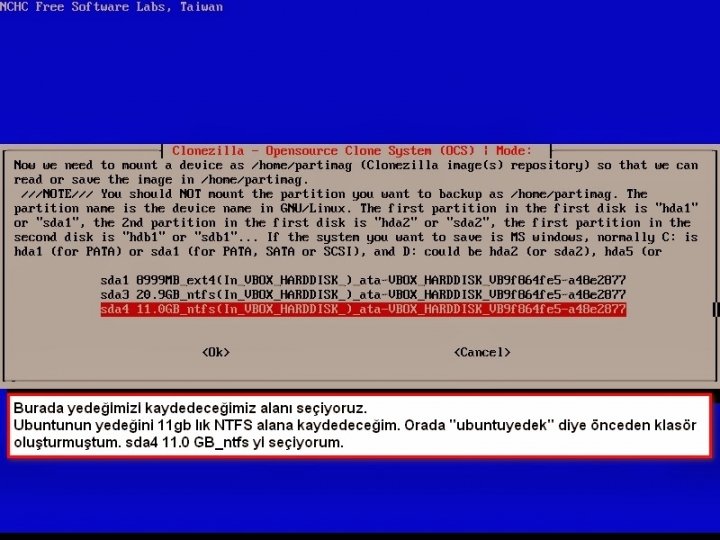
If you perform this operation for first time, create a (top level) directory in the disk you want your images to be saved (in my case clonezilla_athena) in sda8 partition.
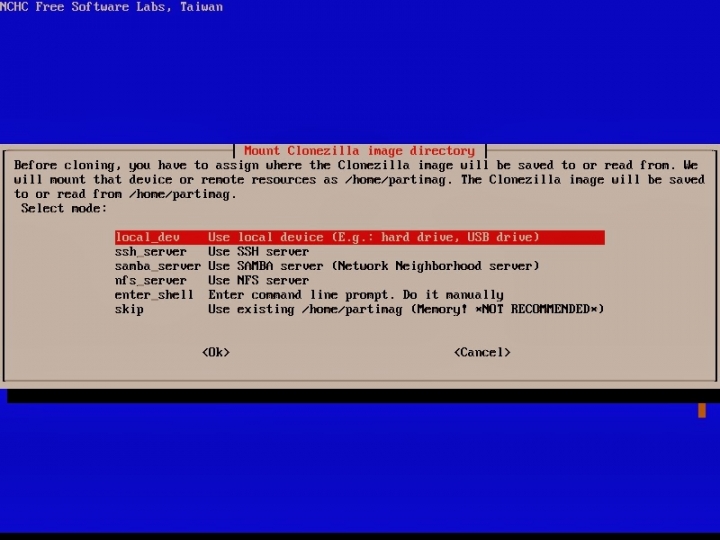
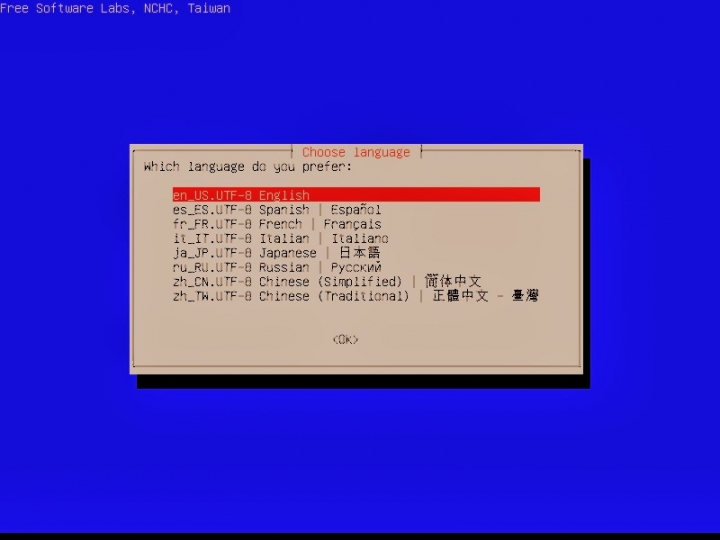
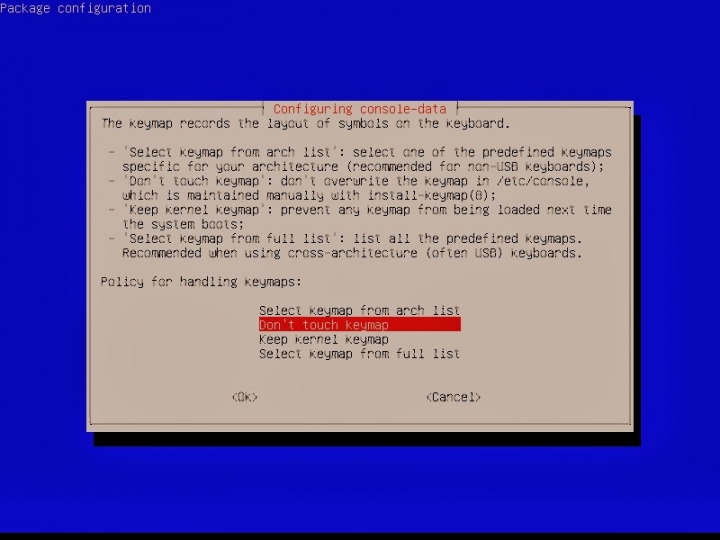
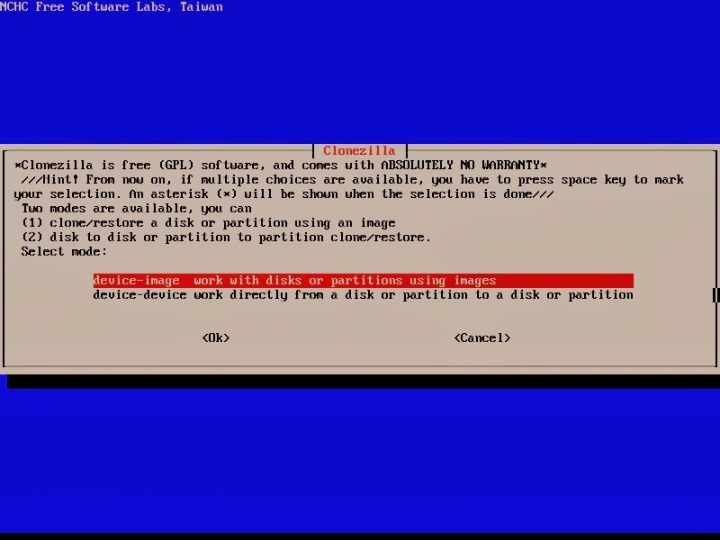
After boot, you have to select language and keymap. Afterwards, select device-image option, which is more safe than device-device (directly copy from one disk to another)

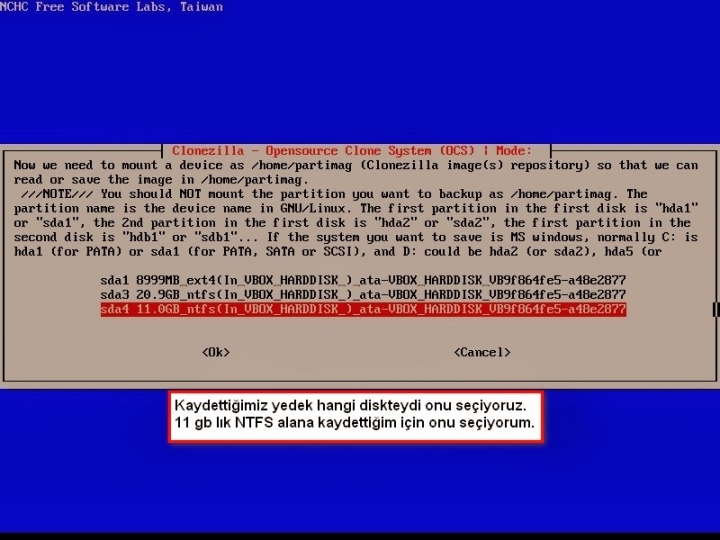
Where you want Clonezilla to save your image? To save this in local device select local_dev

Clonezilla will scan your disks...

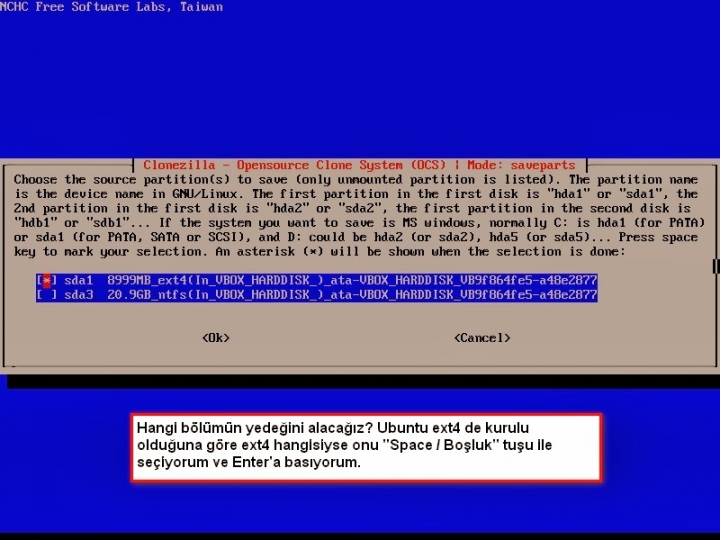
Select the partition where your image will be saved. In my case sda8

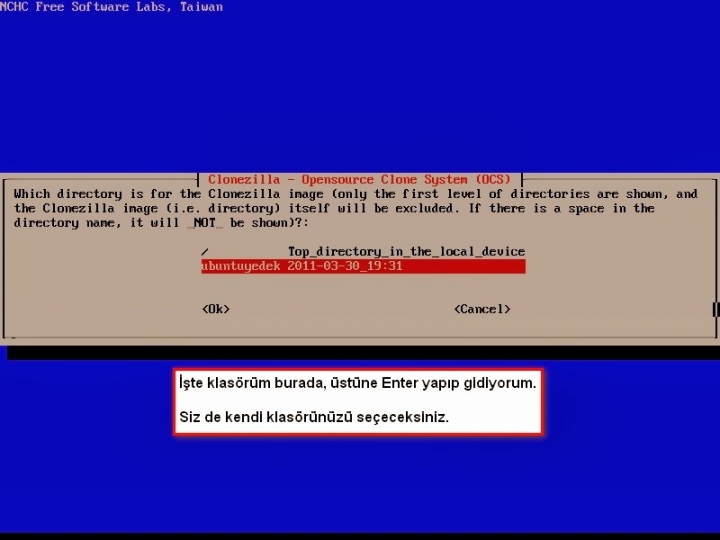
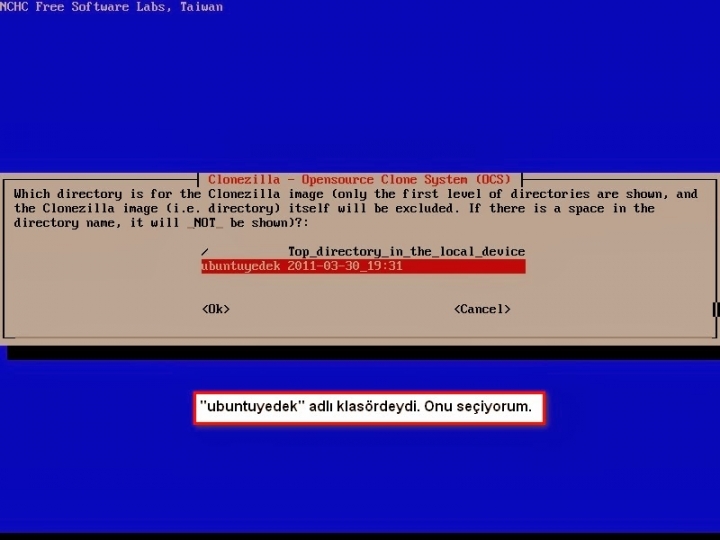
Select a directory in the previous selected partition (must be already existed)

Select Expert mode

Select saveparts to save a partition

(click the thumb for full image)
Backup'ı iso formatında da oluşturabilirsiniz.
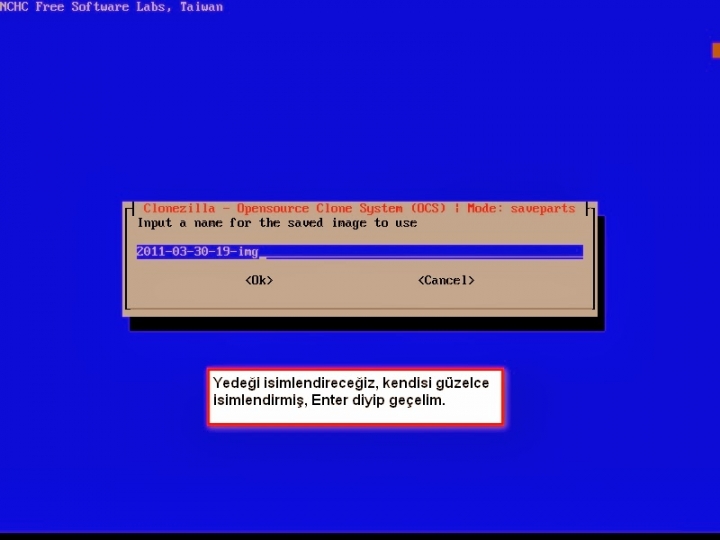
Give a name for your image. A directory will be created with this name, which will contain all image files.

For example, when I save the boot partition, I give this name

Select the local partition you want to save (for example sda1 which is my boot partition)

Tell Clonezilla which tools you prefer to use to clone the selected partition

Set extra parameters. Remark: -j2 Clone the hidden data between MBD and 1st partition is needed only when you clone your boot partition.

Select compression level

Set a number larger than 10 to avoid split image in multiple files

In this step I set 2000000

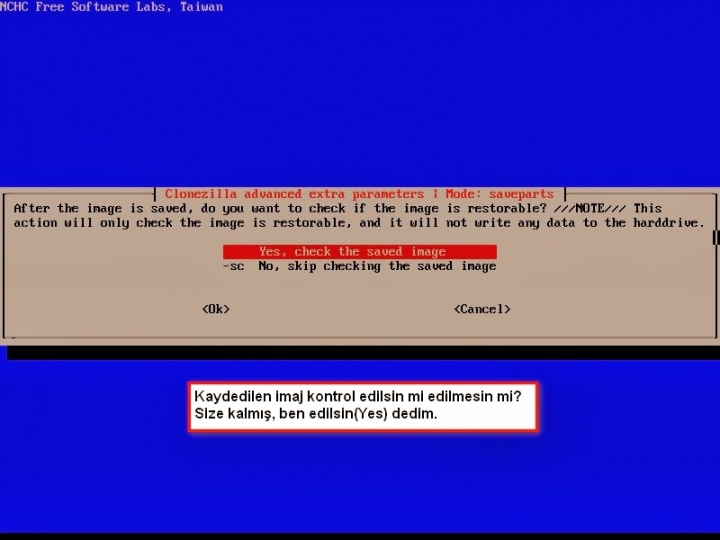
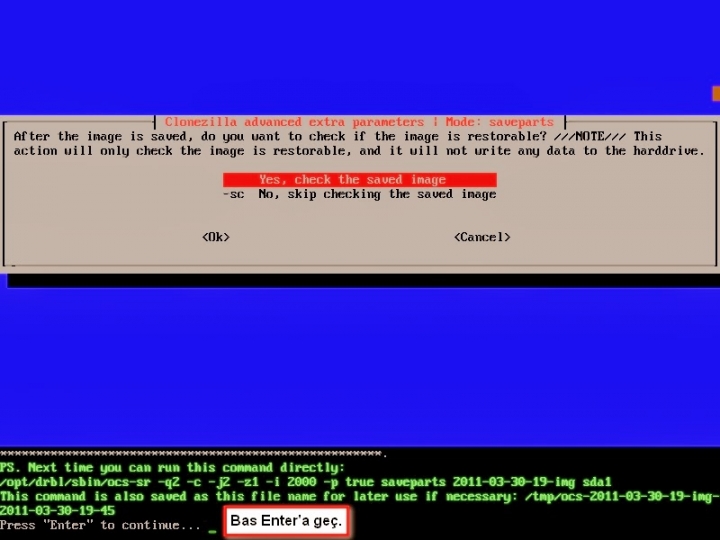
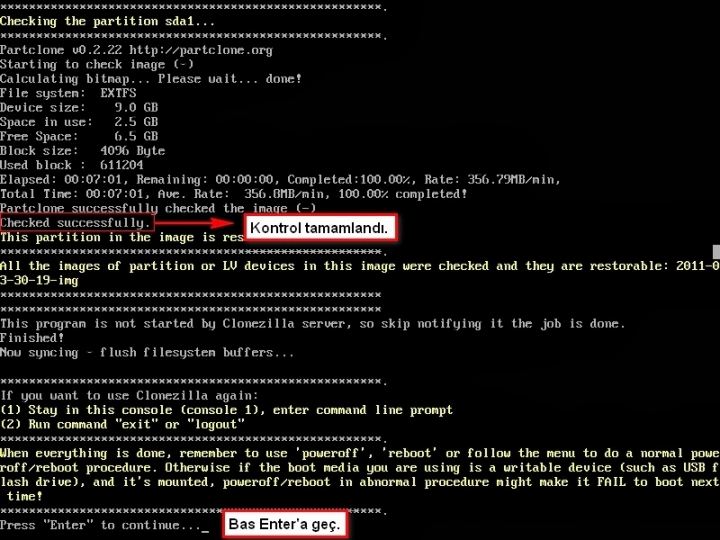
Select Yes, check the saved image

Select the first option here

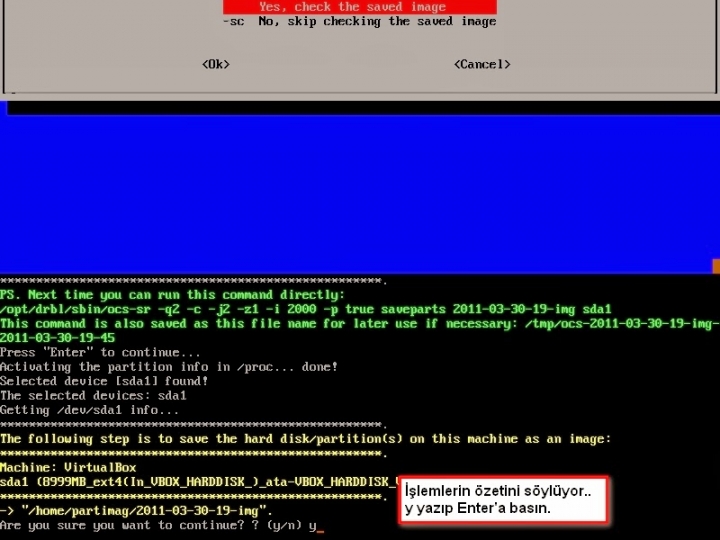
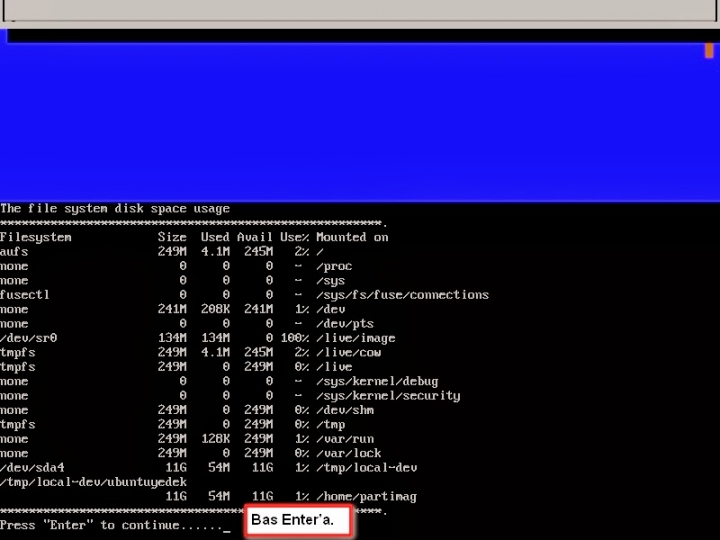
just continue...

just continue...

just continue...

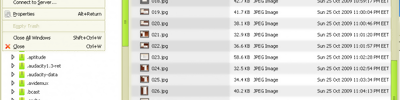
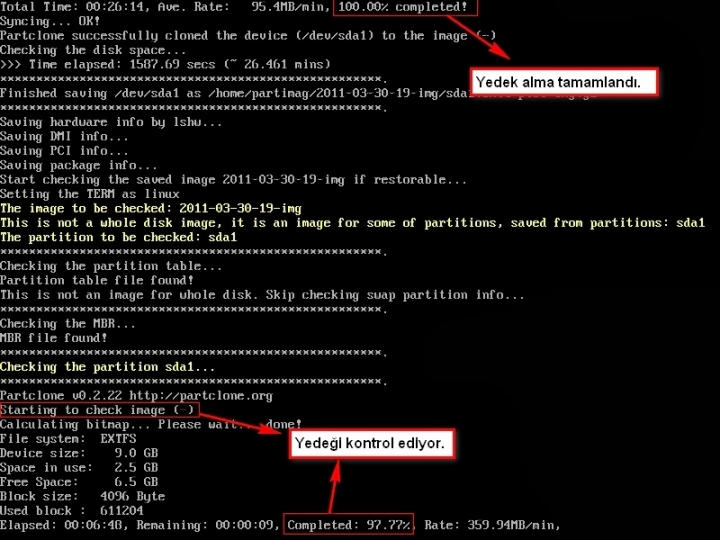
If everything went OK you will see the folder you selected previously which contains your image

And here are the contents of this folder (actually, more than one files have been created)

Repeat this procedure for every other partition you want to save.
Restore
Here are the steps you have to follow, when you need to restore one or more saved partition images.
Again, insert Clonezilla Live CD (or a bootable USB) and reboot your system.
Restore performed in a virtual machine (just for demo purposes).
After boot, select language

Don't touch keymap

Start Clonezilla

Select device-image option, which is more safe than device-device (directly copy from one disk to another)

Where Clonezilla will find the saved image? The default option is loval_dev, but... (see next)

... for this demo I used ssh_server (Clonezilla will be connected with host machine, using SSH, as saved image is located in host computer).

Give SSH settings...

Give SSH settings...(here the IP of the virtual machine)

Give SSH settings...

Give SSH settings...

Give SSH settings...

Give SSH settings...(here the IP of the host machine)

Give SSH settings...

Give SSH settings...

Give the directory where saved images are located

Give SSH password

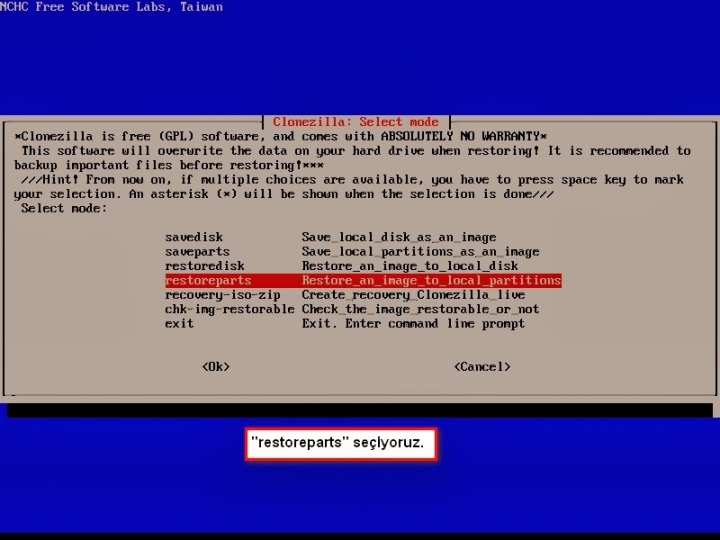
Select expert mode

Select restoreparts

After SSH connection, select the folder where the image is located

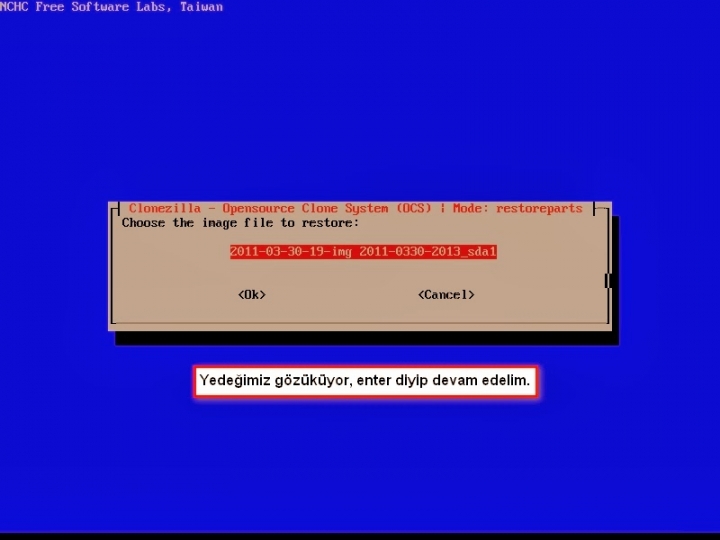
Choose the partition image to restore

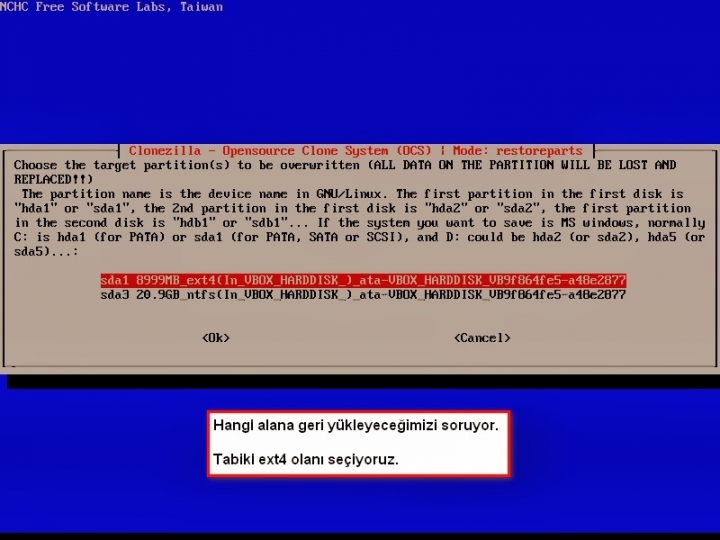
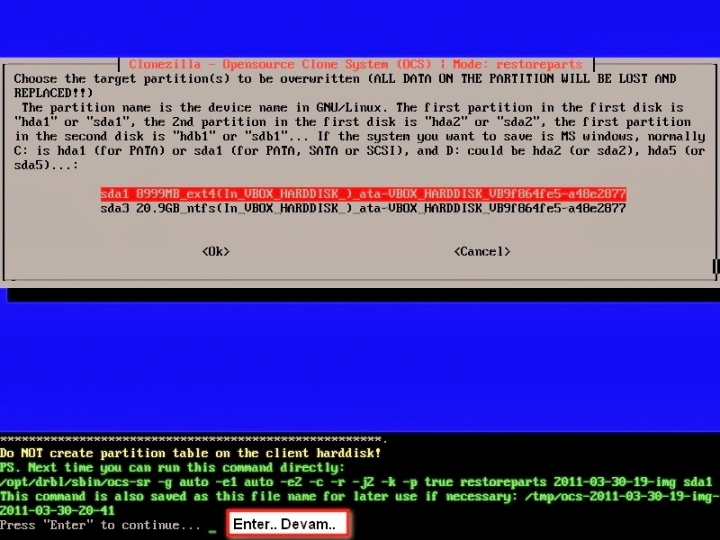
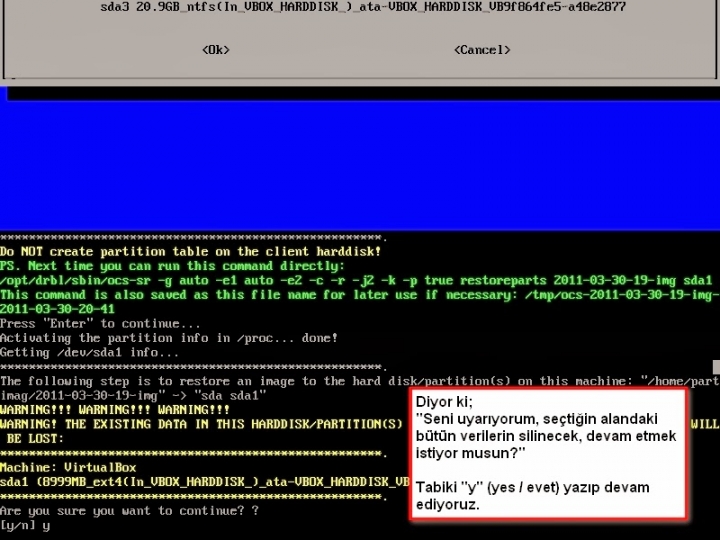
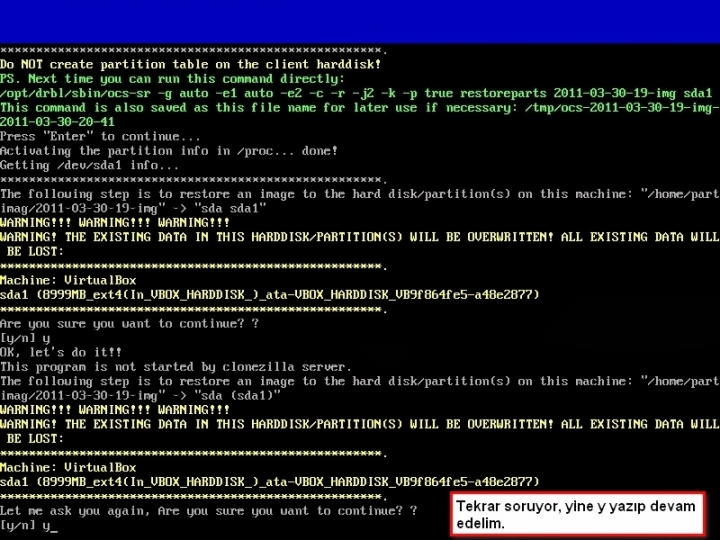
Choose the target partition to be overwritten (ATTENTION!)

Set advanced parameters (I have already created a partition table in virtual machine - otherwise first option would be necessary -g install Grub...)

Set advanced parameters (I have already created a partition table in virtual machine)

Select Yes, check the image before restoring

First option here...

Just continue...

Just continue...

Just continue...

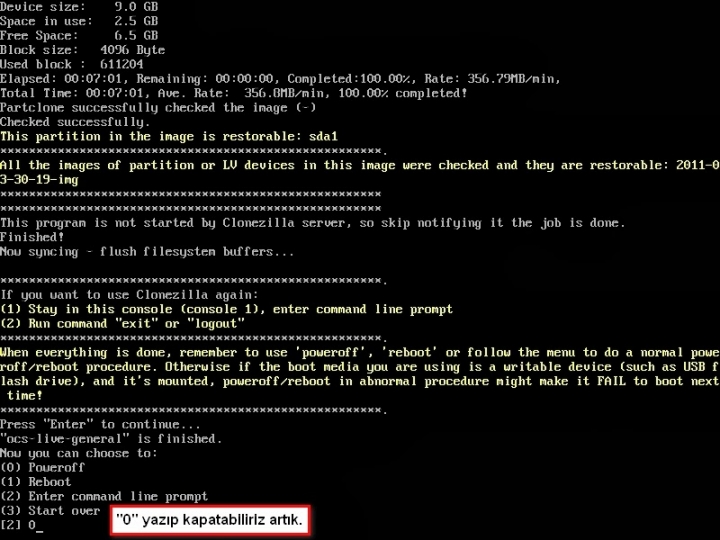
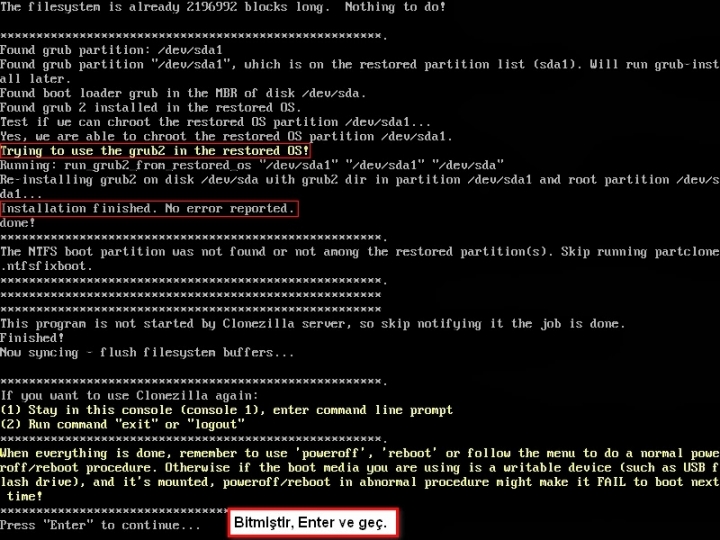
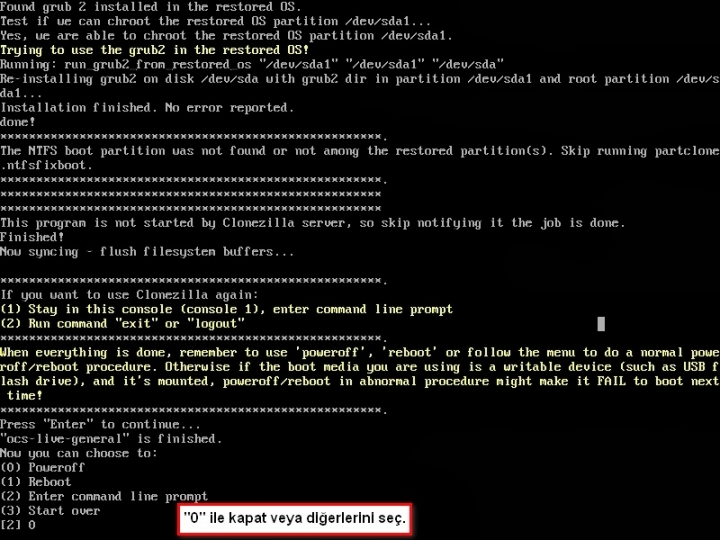
Your partition image is restored successfully!
Select Start_over to repeat this procedure for other partitions you want to restore (if any)

When everything is done, select Poweroff

Kaynak